
Red Light Therapy Panels
Best for: Targeted zone red light therapy and desk use
$449
7.8
/ 10
Celliara Score
Based on real-world usability, consistency requirements, and long-term value
✓ Independently reviewed
Updated April 2026
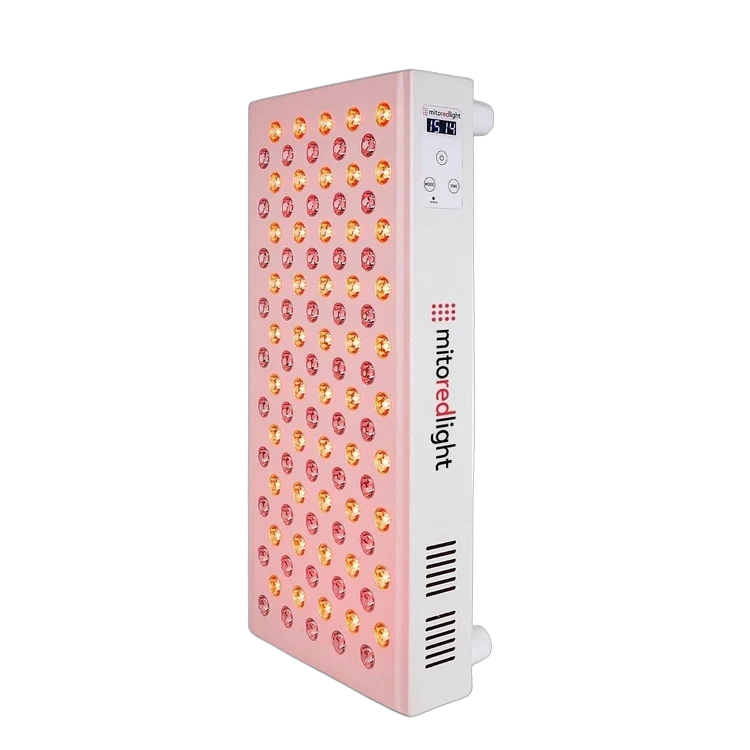
MitoMID 2.0 Review
Best for
Targeted zone red light therapy and desk use
Not ideal if
100 LEDs limits session to one zone at a time
The MitoMID 2.0 is the right panel if full-body coverage is not your priority
Check Price — $449 →View current pricing and availability before it changes
See how it compares before choosing →
LED Count
100 LEDs
Wavelengths
660nm + 850nm
Coverage Area
19 × 9 inches
Session Length
10–20 min/day
FDA Cleared
No — FDA registered
Warranty
3 years
Expert Verdict
7.8
/ 10
Celliara Score
The MitoMID 2.0 is the right panel if full-body coverage is not your priority. At 19×9 inches and 100 LEDs, it is sized for desk or shelf placement — treating a shoulder, lower back, or knee without requiring dedicated floor space or wall mounting. Same dual-wavelength technology as the MitoMEGA at a lower entry point.
Pros
- Compact 19×9-inch footprint fits desk, shelf, or countertop
- Dual 660nm + 850nm wavelengths for surface and deep tissue
- Digital timer — no external timer needed
- Industry-leading 3-year warranty at this price tier
- Same core Mito technology as larger panels at lower cost
Cons
- 100 LEDs limits session to one zone at a time
- Pricier than competing mid-size panels with similar LED counts
- Not FDA cleared for specific medical claims
- Full-body treatment requires multiple repositioning sessions
Best for: Targeted zone red light therapy and desk use
Independent review. No paid placements.
Price verified April 2026
Is the MitoMID 2.0 Right for You?
Most people choose the wrong device because they don't understand how it fits their routine. This is the fastest way to find out.
Buy it if you...
- Compact 19×9-inch footprint fits desk, shelf, or countertop
- Dual 660nm + 850nm wavelengths for surface and deep tissue
- Digital timer — no external timer needed
- Industry-leading 3-year warranty at this price tier
Skip it if you...
- 100 LEDs limits session to one zone at a time
- Pricier than competing mid-size panels with similar LED counts
- Not FDA cleared for specific medical claims
Compare first if you...
- Haven't decided between two specific devices
- Want to see how this performs against a cheaper option
- Are choosing based on one specific feature
Full Specifications
| Technology | |
| Modality | Red + Near-Infrared Light Therapy |
| Wavelengths | 660nm (red) + 850nm (near-infrared) |
| LED Count | 100 LEDs |
| Clearance | |
| FDA Status | FDA registered (not cleared) |
| Usage | |
| Session Length | 10–20 minutes |
| Frequency | 3–5 sessions per week |
| Treatment Areas | Targeted zones — back, shoulders, knees, face |
| Design | |
| Panel Dimensions | 19 × 9 inches |
| Timer | Built-in digital timer |
| Placement | Desk, shelf, or wall-mountable |
| Support | |
| Warranty | 3 years |
Specs sourced from Mito Red Light
Feature Breakdown
Mid-Size Panel: The Right Tool for Targeted Treatment
The MitoMID 2.0's 19×9-inch form factor is purpose-built for targeted zone treatment. If you are treating a specific area — lower back pain, shoulder inflammation, knee joint stiffness, or facial skin — this size hits the zone without requiring you to stand in front of a full-body panel for 20 minutes.
The compact footprint enables desk and shelf use: you can sit and treat while working. This is a meaningful workflow advantage over larger panels that require dedicated wall mounting or floor stands. For office workers treating upper back or neck tension, or anyone who wants to integrate treatment into daily desk time, the MitoMID 2.0 is sized correctly.
The 100-LED array delivers dual 660nm and 850nm wavelengths simultaneously. Irradiance is concentrated rather than spread, which means per-square-inch light density is competitive with the MitoMEGA in the zones it covers.
Purpose-built for targeted use — desk or shelf placement makes daily compliance easy.
Dual Wavelength Technology
660nm red light and 850nm near-infrared are the two wavelengths with the strongest clinical evidence base in photobiomodulation research. The MitoMID 2.0 emits both simultaneously from dual-chip LEDs, which simplifies protocol — you are getting both surface and deep-tissue wavelengths in every session without switching modes.
Red at 660nm targets skin-layer applications: collagen synthesis, surface inflammation reduction, wound healing acceleration. Near-infrared at 850nm penetrates 3–5cm into tissue, relevant for muscle recovery, joint inflammation, and cellular energy production via cytochrome c oxidase stimulation.
For most users treating a single issue — skin quality or joint recovery — one wavelength matters more than the other. The dual-chip design means you are not making that choice; both are always active.
Dual-chip delivers both wavelengths every session — no mode switching, no protocol complexity.
Clinical Evidence: What the Research Actually Shows
The photobiomodulation evidence base is solid for the wavelengths used. Published research supports mitochondrial ATP stimulation (850nm), collagen synthesis enhancement (660nm), DOMS reduction, and inflammatory marker reduction in both in-vitro and human clinical settings. This is not pseudoscience — the mechanisms are reasonably well characterized.
The gap between published evidence and consumer device claims is irradiance. Most peer-reviewed studies use calibrated, high-power devices with verified irradiance delivery. Consumer panels including the MitoMID 2.0 do not provide independently verified irradiance data at specified distances. Mito publishes internal specs, but third-party testing is not available as of April 2026.
Real-world user outcomes at consumer irradiance levels are positive but more variable than clinical study results. Set expectations accordingly: this works, but not as dramatically or quickly as clinical settings.
Strong mechanistic evidence — consumer irradiance gap is the honest caveat for all panels at this price tier.
Total Cost of Ownership
At $349, the MitoMID 2.0 is a mid-range entry with zero ongoing consumable costs. No gels, no cartridges. The 3-year warranty covers manufacturing defects, and LEDs rated at 50,000+ hours mean replacement is not a factor for any practical ownership period.
The main optional add-on is a stand or mounting bracket ($20–$40) if desk placement does not work for your target treatment zone. Eye protection ($15–$30) is worth adding for any near-face work.
Annualized over 3 years: approximately $116/year — among the lowest in the targeted panel category. The ongoing cost per session is effectively zero beyond electricity (fractions of a cent per use).
Zero consumables, 3-year warranty — lowest long-term cost of any therapy modality at this quality tier.
MitoMID 2.0
Best for: Targeted zone red light therapy and desk use
$449
We may earn a commission. This doesn't affect our editorial independence.
Real-World Performance
This is where expectations often break down for new users. What the device delivers in controlled conditions versus consistent home use are two different things.
⚠ This is where most people go wrong
The MitoMID 2.0 is a targeted panel. Treating it like a full-body device — standing 18 inches away to try to cover more area — drops irradiance to the point where results are marginal. Pick a zone, get close, and stay consistent. Trying to cover too much surface area with a mid-size panel is the most common mistake.
The Targeted Protocol That Works
Effective treatment requires correct distance, consistent frequency, and zone specificity. Total session time per zone: 10–20 minutes. At 4× per week, most users report meaningful changes at 6–8 weeks.
Step 1 — Zone selection and positioning (1 min)
Decide on your target zone before each session. For skin applications (face, neck), position 4–6 inches from the panel. For deeper tissue targets (shoulder, lower back, knee), 6–12 inches is optimal. Lock in a consistent position — variation between sessions introduces inconsistency in dose delivery.
Step 2 — Session (10–20 min)
Use the built-in digital timer. Start with 10 minutes per zone for the first two weeks, then extend to 15–20 minutes if you are not experiencing any skin sensitivity. For desk use, angle the panel at your target zone and work normally — passive treatment during work sessions is the most sustainable protocol.
Step 3 — Post-treatment stack (optional, 5 min)
For skin targets: apply a Vitamin C serum or antioxidant treatment immediately after to compound collagen synthesis benefits. For joint and muscle targets: a light stretch or massage of the treated area while tissue is warm improves circulation and compounds recovery benefits.
Supporting Products Worth Adding
8 weeks
Minimum treatment duration in published studies showing measurable collagen changes from red light exposure at consistent frequency.
Source: Journal of Cosmetic and Laser Therapy, 2020
Source: Journal of Cosmetic and Laser Therapy, 2020
Vitamin C Serum ($25–$60) — Post-treatment skin absorption is temporarily enhanced. Antioxidant serums compound the session benefit. See our guide to post-treatment serums →
Panel Stand ($20–$40) — For any non-desk use, a freestanding bracket makes consistent positioning easier and reduces session friction.
Frequency Reality Check
Three sessions per week is the minimum; four is better. The photobiomodulation literature is unambiguous that cumulative exposure over weeks matters more than any single session. Understand how LED light therapy works before setting timeline expectations. The MitoMID 2.0 is a tool that works when used — it does not work when it sits on a shelf.
For a complete session setup — eye protection, panel positioning, and post-session serums — see the Red Light Therapy Panel Protocol.
Without this protocol, most users won't see meaningful results.
Price & Value
$449
Mid-RangeAt $449, the MitoMID 2.0 sits above the mid-size panel average. Budget competitors like the BestQool 170W ($229) and Hooga HG300 ($149) offer more LED density per dollar. The Mito premium is justified by build quality, the digital timer, and the industry-leading 3-year warranty — but at $449 the value case requires a cleaner result set.
Premium pricing for the segment — the 3-year warranty and build quality earn it, but budget alternatives exist.
Where to Buy
Amazon
$449
Prime eligible. Check for current pricing.
Alternatives to Consider
If this isn't the right fit, these are the closest alternatives worth considering.
If you want full-body coverage
If you want the best value mid-size option

Still deciding?
Comparing two specific devices is often the fastest path to a confident decision. We've done the side-by-side work for you.
Frequently Asked Questions
Targeted zone treatment: lower back, shoulder, knee, neck, or facial skin. It is not designed for full-body coverage — for that, the MitoMEGA 2.0 is the better choice. The MitoMID 2.0 excels when you have a specific problem area and want to treat it daily without a large floor-space setup.
Yes. At 19×9 inches, it is sized for desk or shelf placement. Many users treat during work sessions — angle it at the target zone and let it run passively. This dramatically improves adherence compared to protocols that require dedicated session time.
At $349, the MitoMID 2.0 carries a significant premium over budget mid-size panels like the Hooga HG300. The premium buys you Mito's 3-year warranty, digital timer, and quality assurance. If budget is the priority, cheaper alternatives exist. If you want reliability and warranty coverage, Mito justifies the price.
Minimum 3 sessions per week, ideally 4–5. Effects are cumulative — daily use is safe and accelerates progress. See our LED frequency guide for detailed protocol recommendations by treatment goal.
No — it is FDA registered as a general wellness device, not FDA cleared for specific medical conditions. This is standard for consumer-grade red light panels and does not indicate ineffectiveness. It means the device has not completed the clearance process for specific clinical claims.
Our Pick
MitoMID 2.0
Best for: Targeted zone red light therapy and desk use
Our Verdict
7.8
/ 10
The MitoMID 2.0 is the right panel if full-body coverage is not your priority. At 19×9 inches and 100 LEDs, it is sized for desk or shelf placement — treating a shoulder, lower back, or knee without requiring dedicated floor space or wall mounting. Same dual-wavelength technology as the MitoMEGA at a lower entry point.
Check current pricing and compare it against alternatives before deciding.
We may earn a commission if you purchase through our links. This does not affect our editorial scoring or recommendations.